
Mug Rug Challenge
by Donna Petrick
Thank you to all of you who participated in the latest activity--Mug Rug Challenge/Exchange. There were some really cute ones done. I hope you enjoyed being involved in this activity. While I saw this done at the Irving guild, I understand that Janet Plotkin (our new VP of Activities) may be the one who started it in this area. Thank you, Janet. And I know all of you are looking forward to move activities to come and Janet will do a wonderful job, keeping us busy with fun projects.


Do-It-Yourself Round Robin Challenge
By Linda Neal
The new guild activity for 2015, from our Activities Chairperson Linda Neal, is a Do-It-Yourself Round Robin. To start, you will need to find or make your center block. This is a great time to use a UFO block, or make a new block. Starting in January, you will add a border every other month, for a total of six borders. Each border will use a different technique. Linda will present each border style at the guild meeting and show examples. This guild activity is meant to be fun and to encourage creativity. Get the details and lots of tips for success by downloading the Round Robin Information Sheet.
Linda and MJ showed us some examples of Round Robin quilts at the November meeting.


Border #1 - Traditional Pieced Border
The first border you are to add is a traditional pieced border, pieced by hand or by machine. You choose the pattern, the width, and the colors. Linda made three poster boards of possible pieced borders that you might choose:

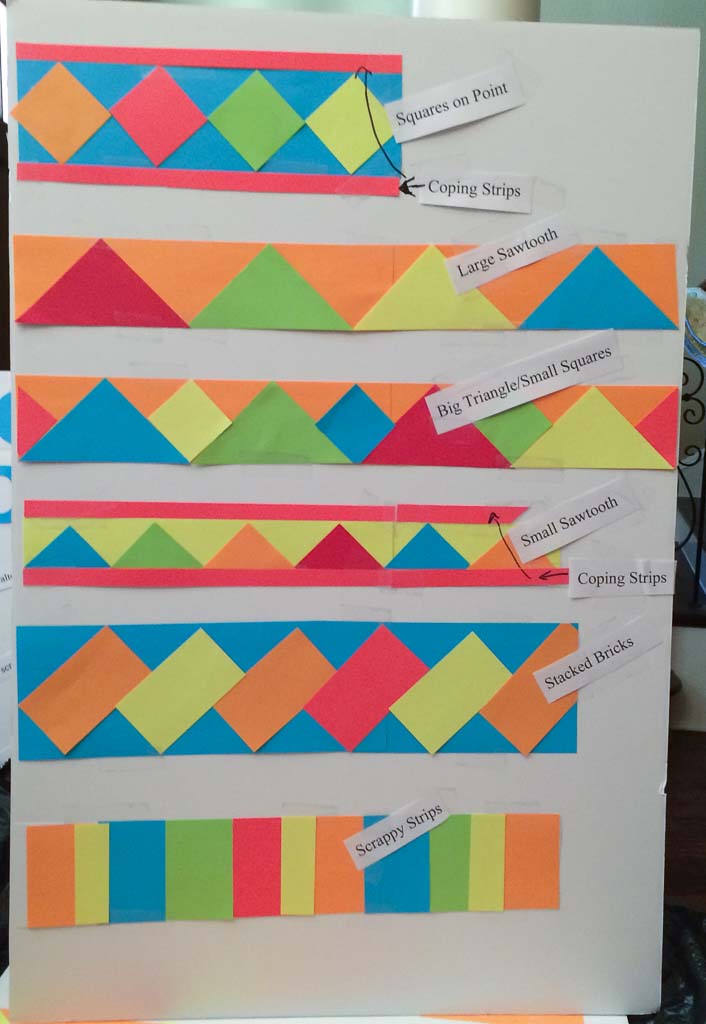
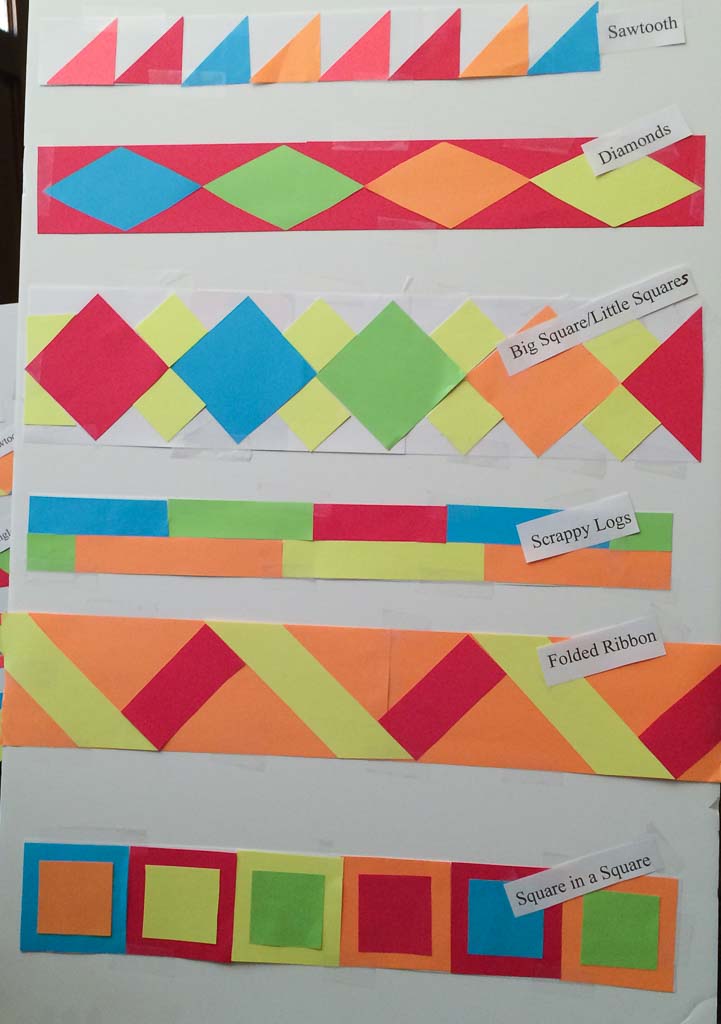
There are lots of other possibilities to choose from: border books, Pinterest, patterns you may have at home. If you search the internet for ideas, search under "medallion quilts."
Consider using floating or coping strips to join your block to your first border. (See examples on the poster boards.) The strip can be used to separate the block from the border, or you may need it to make the border fit your block.
You have two months to make your first border. The January presentation of the pieced border will be repeated at the February meeting. In March, Linda will announce the next border to add to your quilt - it will be completely different from a pieced border! Consider bringing your project to guild to inspire others as you complete your borders. Have fun working on your first border.
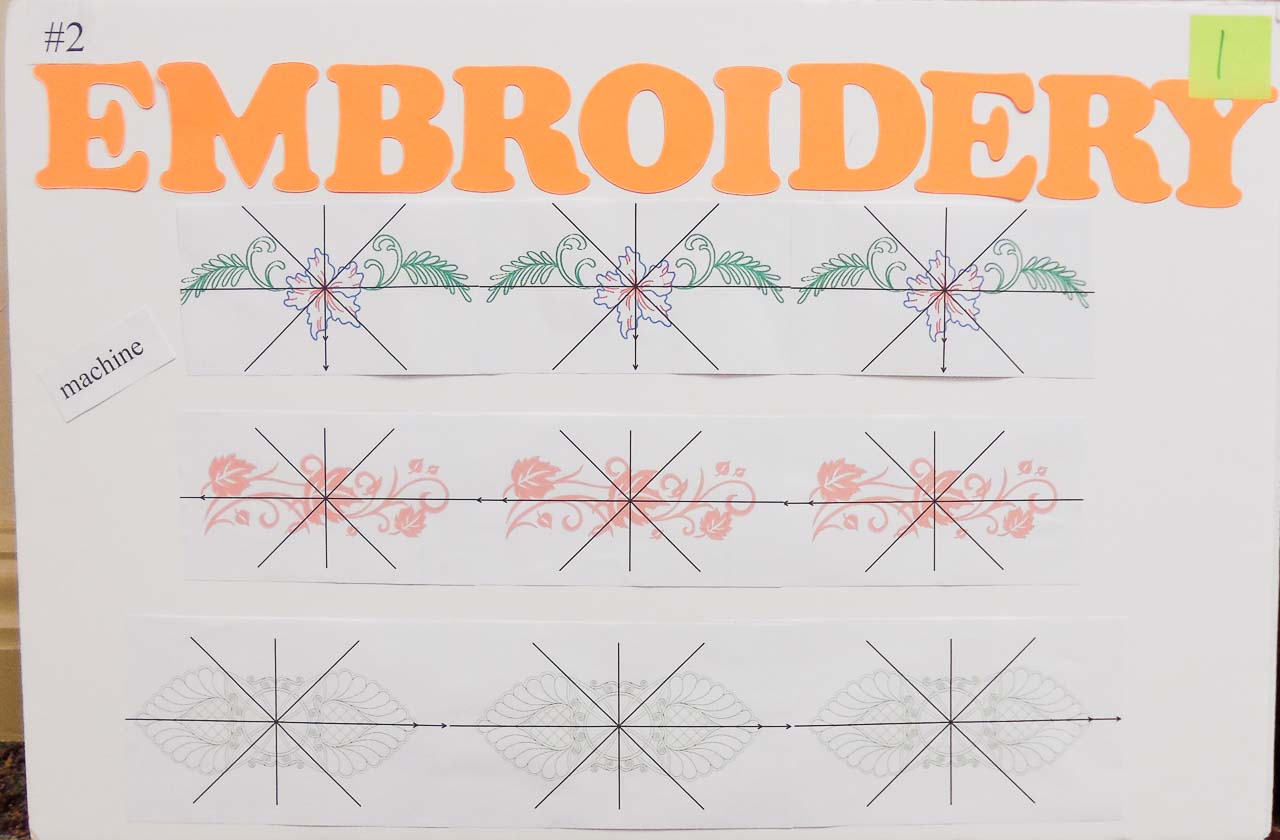
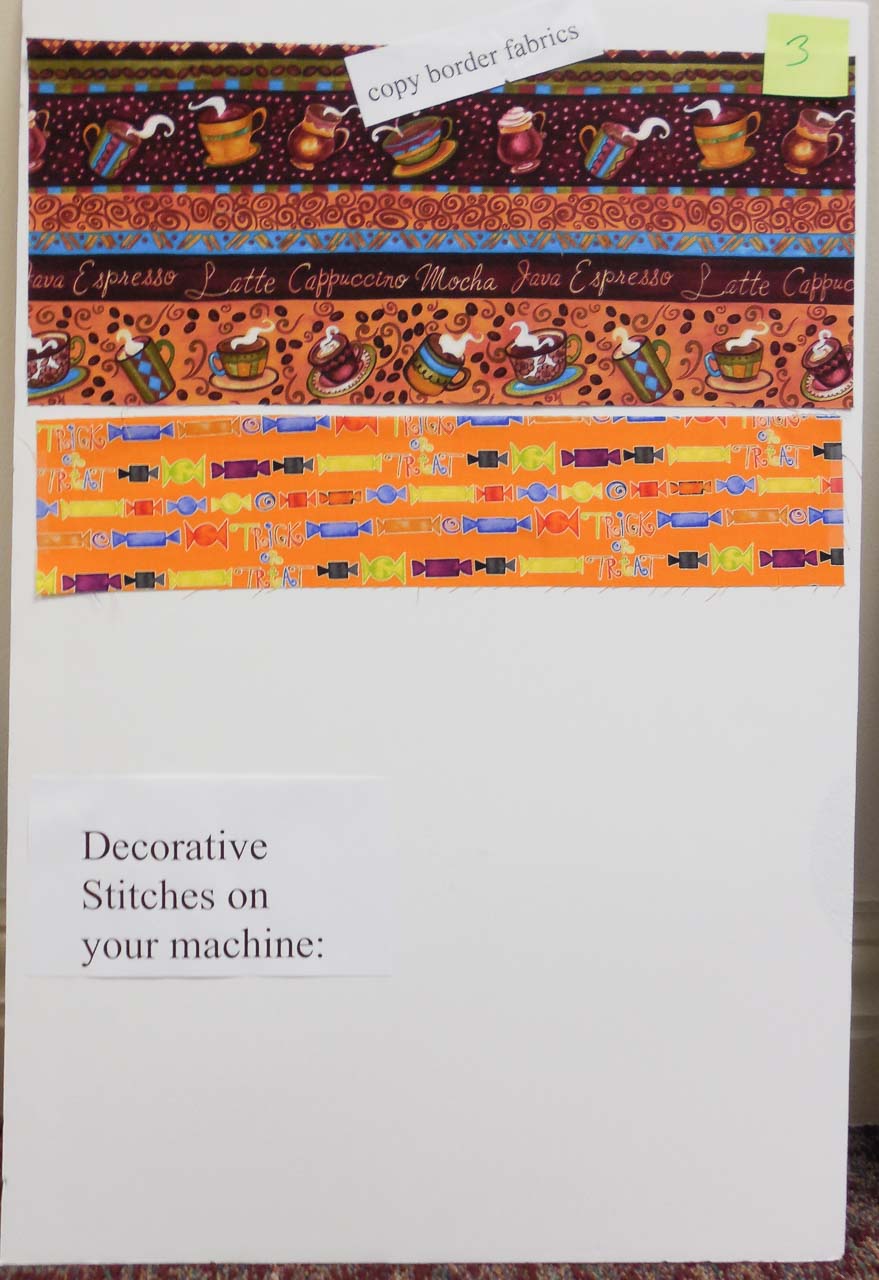
Border #2 - Embroidered Border
The second border to be added is an embroidered border. This can be done in several different ways:
- Machine embroidery - for those who have embroidery machines, this is for you! Find a border that works well with your center block/first border or create your own, putting together several different patterns. Have fun!
- Hand Embroidery: (Photos are not shown out of respect for copyrights)
- Trace commercial patterns from Crab Apple Hill, Bird Brain Designs, Scarlet today, etc.
- Iron on commercial patterns from Blooming Borders by Heather Baily, Stitcher's Revolution, Aunt Martha's, etc. Or Google "iron on transfers" - there are tons out there...
- Use pillow case embroidery patterns - they work great because of their length. Adjust accordingly to fit the length you need.
- Copy a poem or phrase. Choose a font to match your style quilt. Have it go on all four sides around your quilt.
- Trace a border fabric or a piece of fabric used in your piece and use it for your pattern.
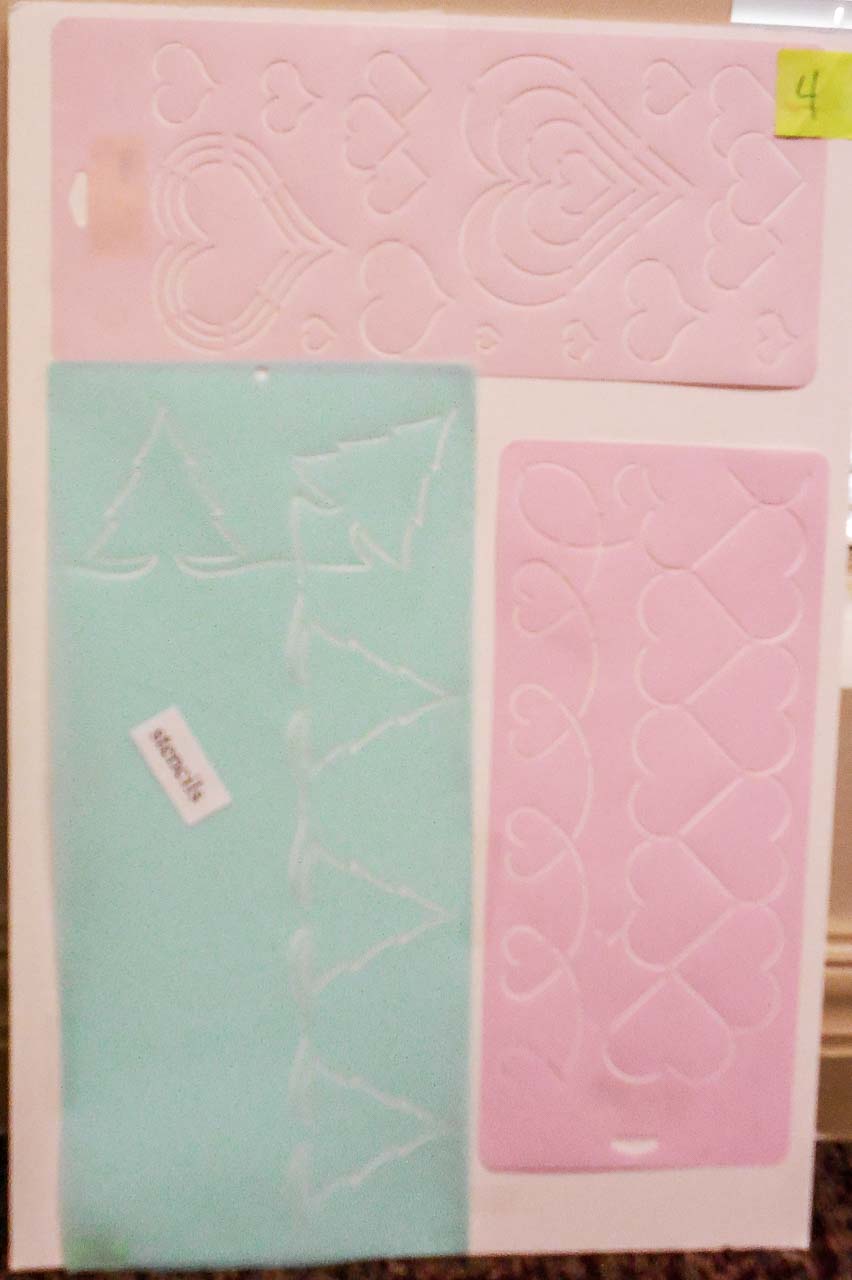
- Trace quilting stencils.
Embroidery not your thing? Consider:
- Using those decorative stitches on your machine that we never use!
- Recycle some old embroidered handkerchiefs, doilies, etc., and incorporate them into your border.
- Michelle Watts is teaching a class on Redwork machine embroidery April 10th - sign up and learn a new way to embroider!
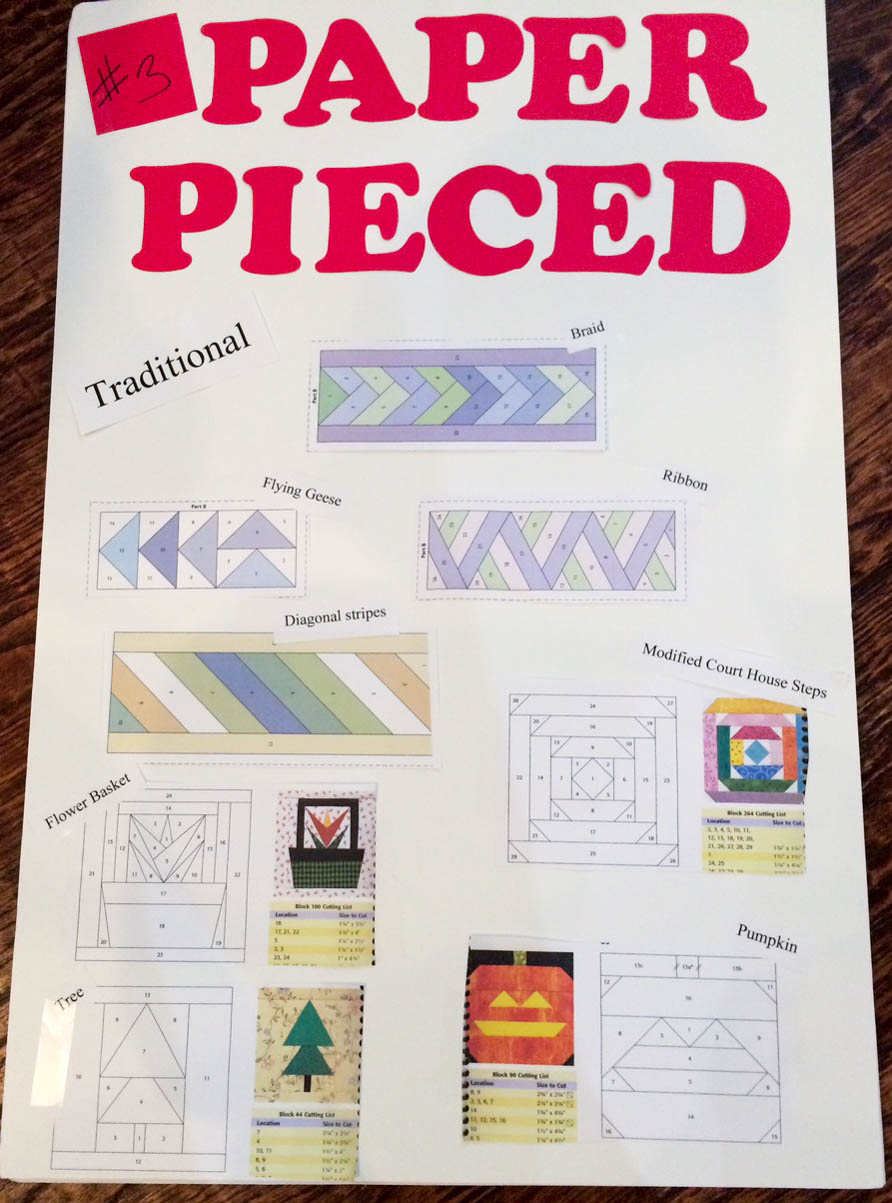
Border #3 - Paper Pieced Border
Border #3 is a paper pieced or foundation pieced border - any technique that involves basting/sewing your fabric to paper to make your border. Remember, you can make the whole border paper pieced or just parts of it.
- Traditional Paper Foundation Piecing:
- Make the entire row paper pieced - braid, flying geese, ribbon border, diagonal stripes, etc.
- Make individual blocks and put them together to form a row or cornerstones. Basket block, pumpkin block, tree, star, etc.
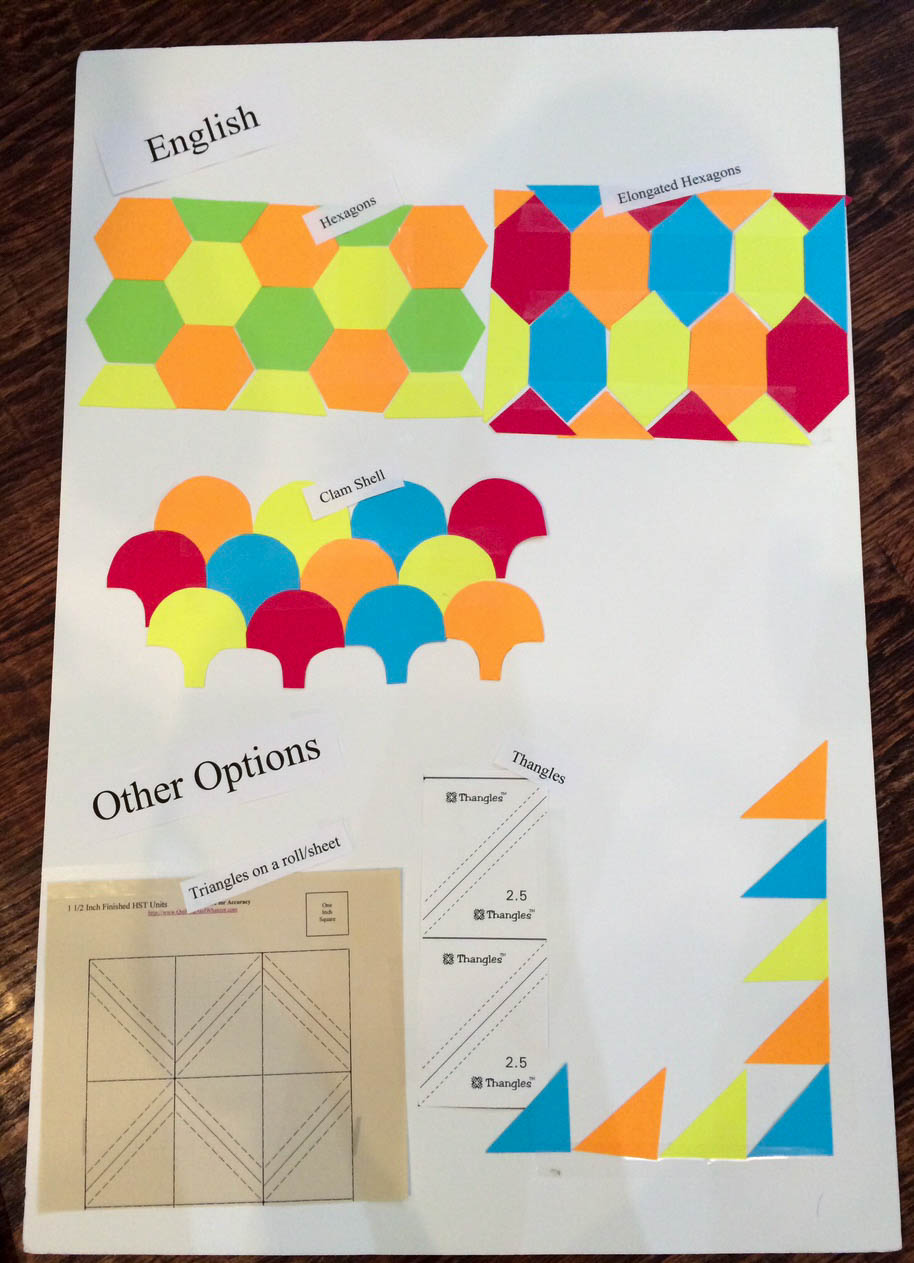
- English Paper Piecing:
Any shape or size - hexagons, elongated hexagons, clam shell, etc. - Other Techniques:
Use Thangles, Triangles on a Roll/sheet to make triangles and put together a border.
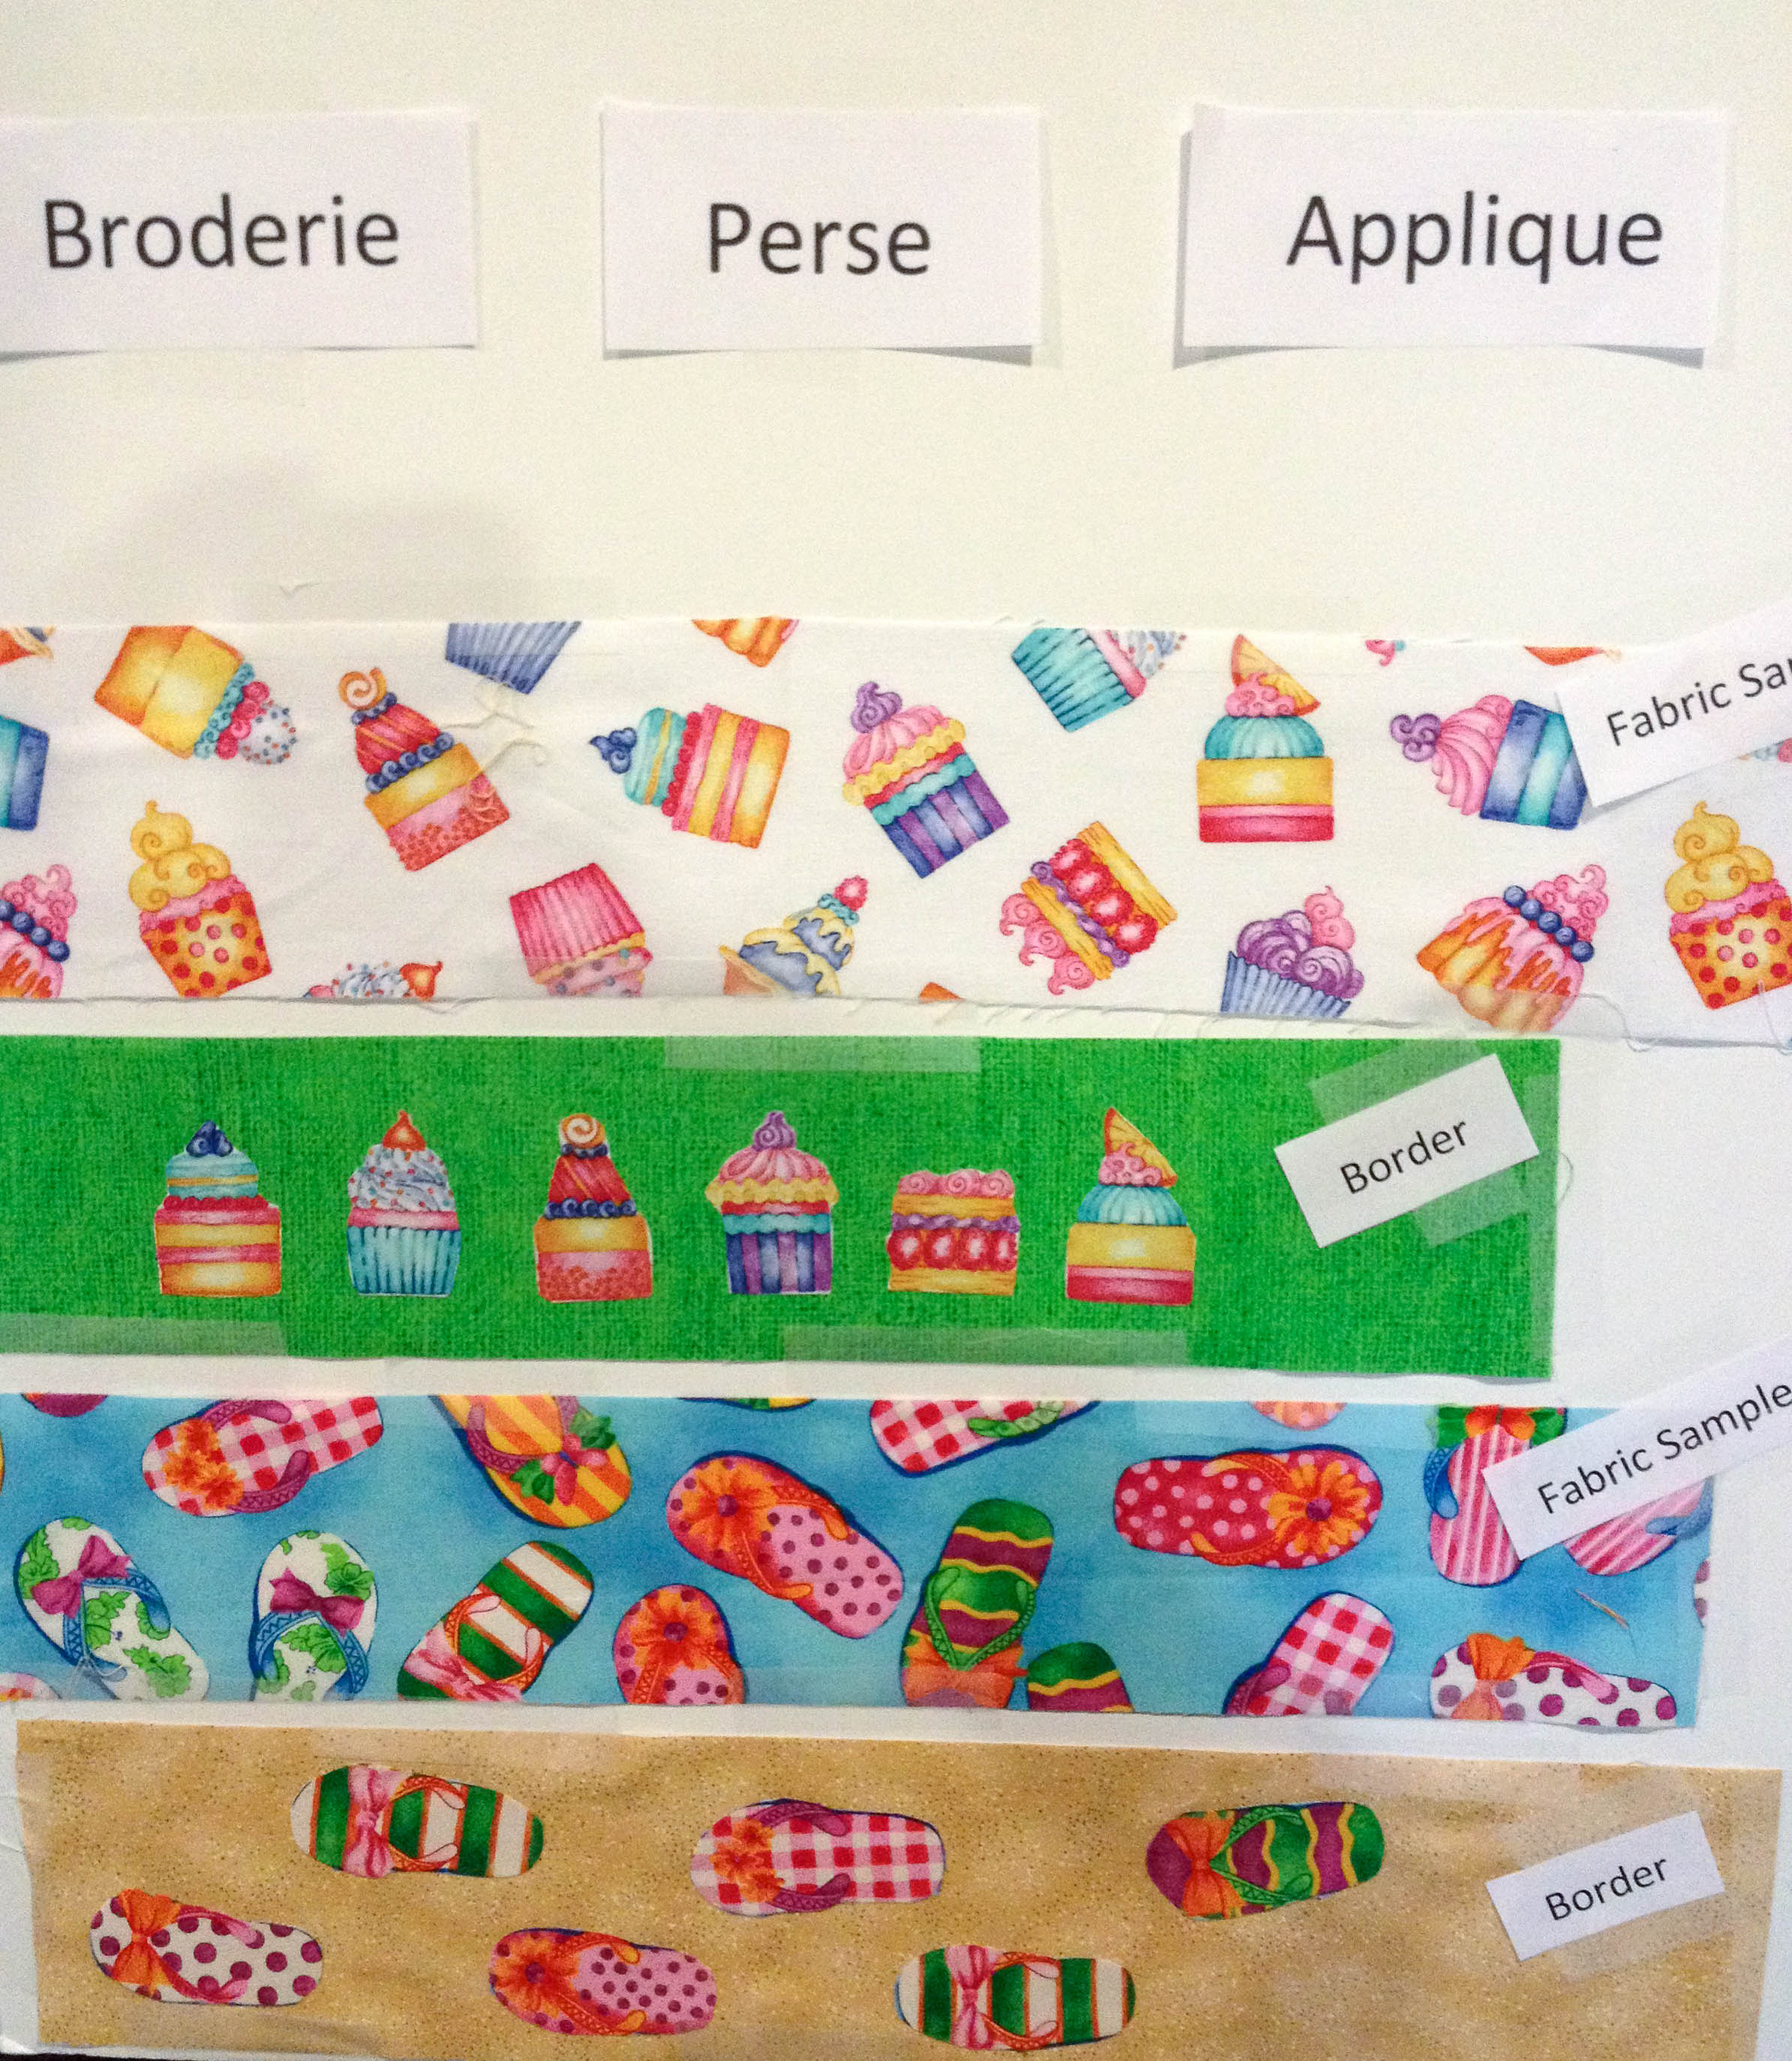
Border #4 - Applique Border
Border #4 is applique. You can do hand applique, machine applique, or if you have an embroidery machine you can do machine embroidery applique.
Another type of applique is broderie perse. This is a technique that has been around since the 1800's. It can be done with a fusible web or needle turn. Find a motif on some fabric that coordinates with your quilt. Apply fusible to the back. Fussy cut the motif. Iron it on to plain fabric. Then use your machine to zig zag or blanket stitch the raw edge,like machine applique.
As always: You can do as much or as little applique as you desire. Either just the 4 corners or do the entire side. Have fun!
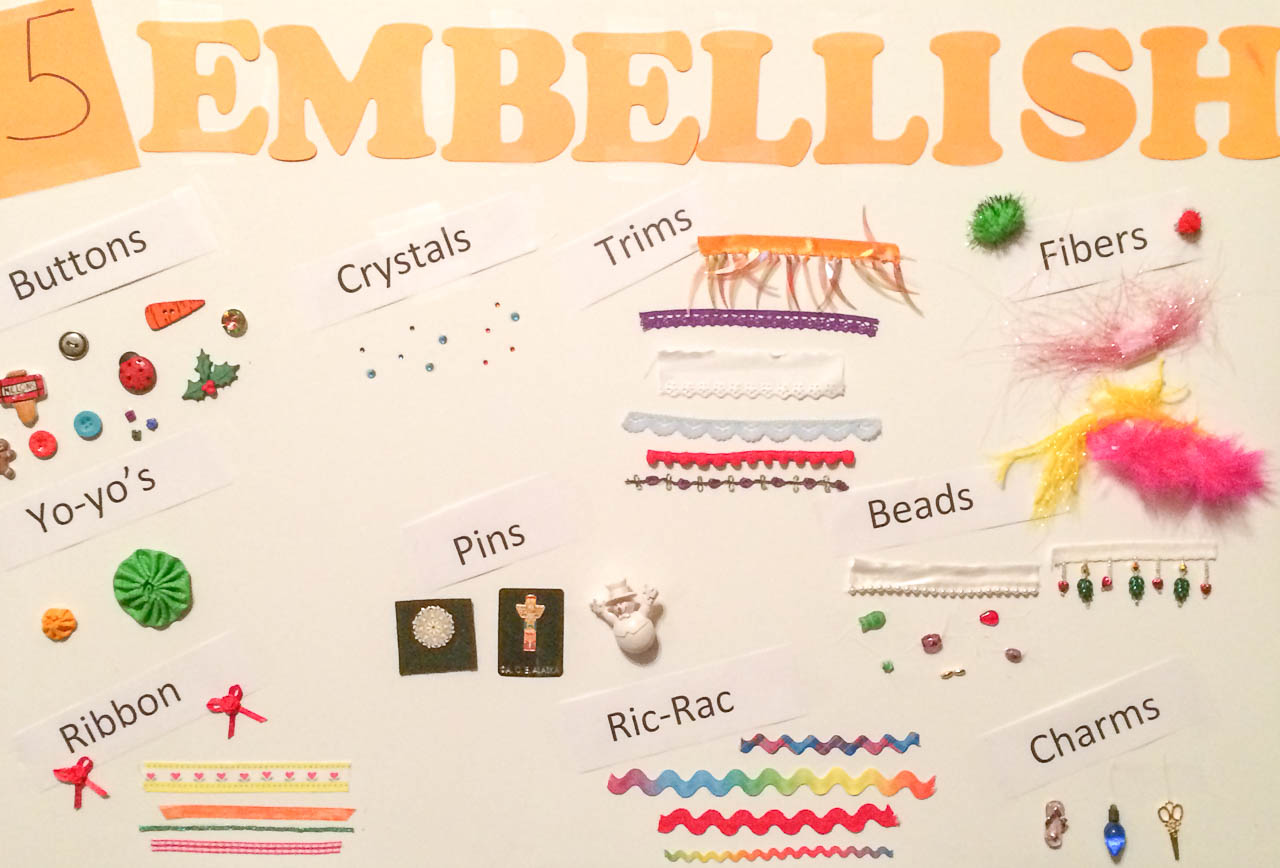
Border #5 - Embellished Border
Border #5 is embellishment. You may choose ANY border style and then add embellishment. Depending on the type of embellishment you choose, the embellishment may be added now or after quilting. Any amount or type of embellishment will fulfill the border #5 challenge. Embellishment means to add a decorative item to a quilt top. I have listed several types of embellishments, but you can add ANYTHING that works for your project.
- Buttons - Ceramic, plastic or metal. They can be glued or sewn on.
- Yo-yo's - Any size or shape. Check out a great website: marcialaytondesigns.com.
- Ribbon - Grosgrain, organza, or silk.
- Crystals - Swarovski crystals that are heat set. See cheriscrystals.com. Or less expensive crystals from craft stores- glued on.
- Pins - Decorative or heirloom.
- Trims - Lace or any other type of trim.
- Ric-Rac - It now comes in a variety of sizes and colors (solids, polka dots, plaids, stripes).
- Fibers - Feathers, or Angel hair fiber. Threads that Bind in Plano has a great assortment.
- Beads - Glass, wood, or plastic. Available at specialty bead shops or craft stores.
- Charms - Lots of possibilities!
And remember the Houston Quilt Show is coming up. They will have LOTS of fun embellishments. Have fun with border #5!
Border #6 - Wrap It Up Border
We made it to border #6! This border is called "Wrap It Up." You may add whatever type of border that is needed to complete your quilt. You may want to repeat an element or technique you have used previously. Or maybe you want to just add a focus fabric to pull your quilt together. You can just sew on a focus fabric for a border, or maybe you would like to put your fabric on by appliqueing scallops. See Picture #1. Remember: this is your last border so have fun with it!
The last "challenge" I have for you is the edge treatment. I challenge you to try something you have not done before. This can be done to the edge of the quilt before quilting or by adding a fancy binding as described below. Examples of a quilt edge treatment include: Rounded corners, Scalloped, or free form edges. (See Picture #2).
Or how about trying a different type of binding. (See Picture #3). Examples include:
- Double sided binding
- Scrappy binding
- Add a flange/fold
- Piping/cording
- Add trims, laces, Rick Rack, or other embellishments
- Corded Binding- Sharon Schamber technique
- Prairie Points

Picture #1

Picture #2

Picture #3
I hope you have enjoyed this years Do-It-Yourself Round Robin Challenge. It has been fun watching everyone's progress. Please bring your project to the guild meeting to show off your work!